Houdini Lighting — Solaris/Karma — Render Basics
In 2023 I was using Karma to render (cpu) on one of my projects (Candy Corn Scissor Stretches) and it was taking 51 minutes a frame in Mantra vs 15 in Karma-cpu). I was not getting the results I wanted out of Redshift on this particular piece, so I thought I'd give Karma another go. Since I had set it up in mantra I wanted a quick solution and Karma-xpu did not respect the rounding of corners in the shader, but cpu did.
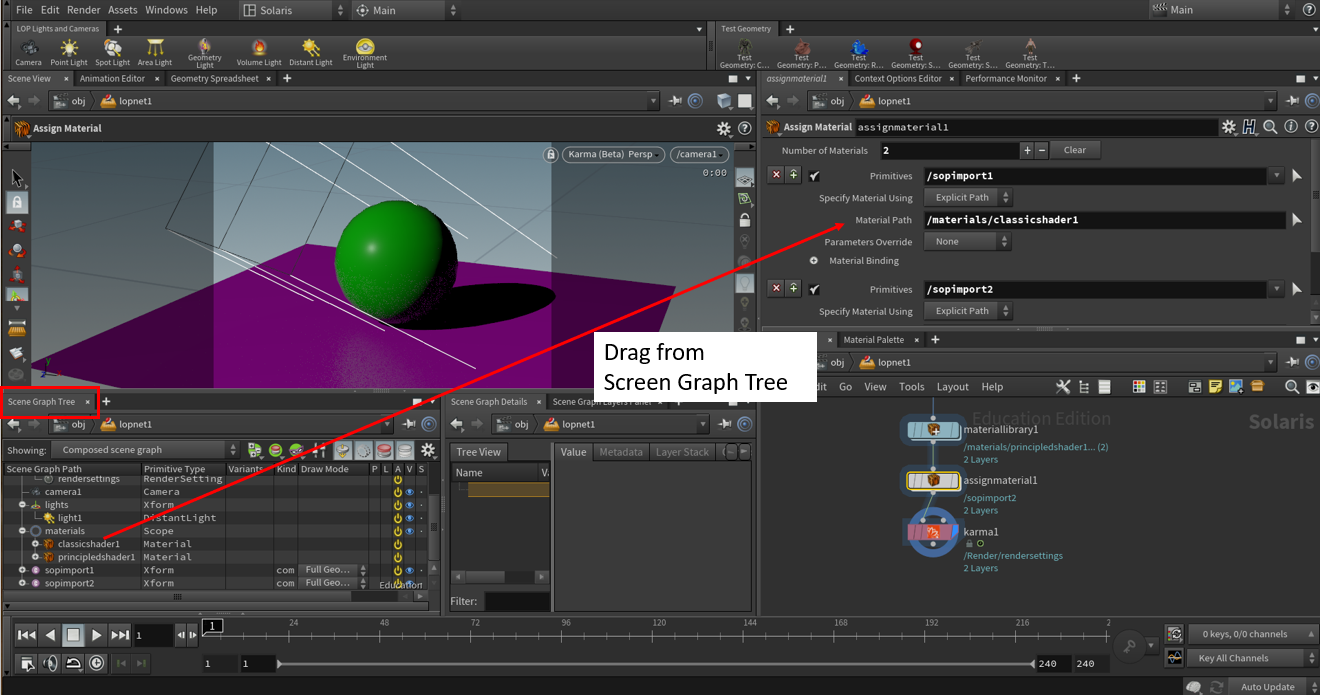
To assign a shader to your object use can use the assignmaterial node (also called a lop) or the materiallibrary lop.
This assumes you are in the lopnet (or stage) context and you have set up your scene for lighting using USD. You will also need an available material.
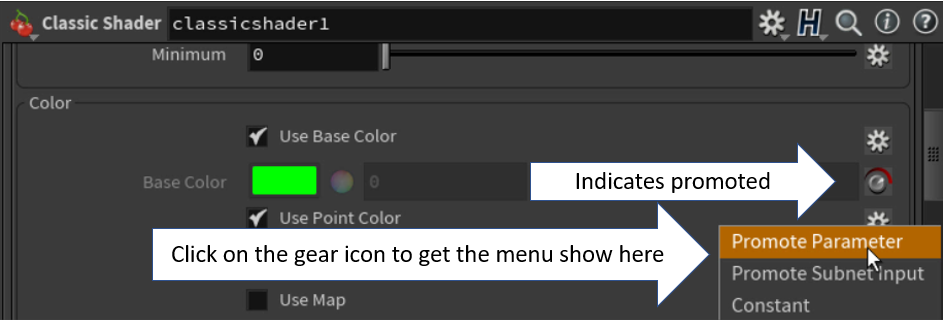
materialibrary - to create materials, dive inside this node - you can copy them from the /mat context or tab create, for example principled or classic.
Option 1: Click Auto-fill Materials. Drag your mesh to the geometry path.
Option 2: Use the assignmaterial by dragging the mesh you want to assign to the primitive and dragging the material from the Scene Graph Tree.
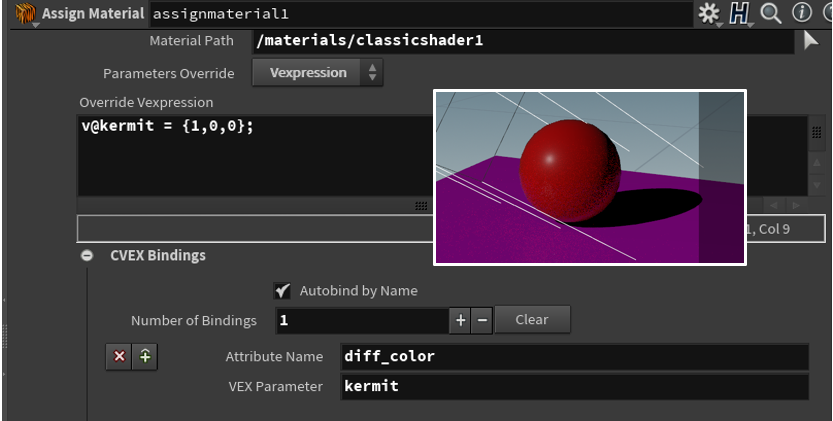
basecolor) and the classic shader (use diff_color).
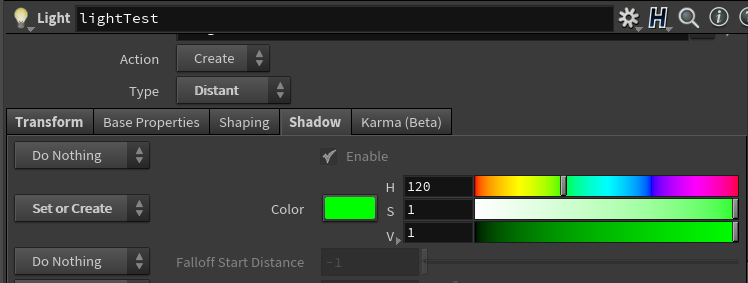
- you can use shadow color (this really should be defined by the fill lights, but may in some cases want to add a wee little touch of color - for example (.01,.007, .01)).
- Parameter was added as of H12.5 and up and exists in H18
- This parameter is useful for two things:
- when the lighting is perfect but the shadow is a bit drab or dingy
- when you are debugging - crank it up to red for example (less useful now that we can easily use the lightmixer to disable and solo lights.
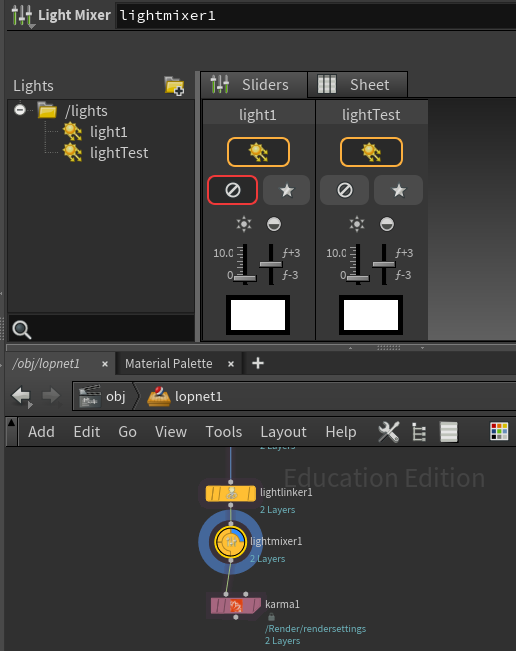
Lightmixer: allows you to manipulate lights easily, including solo and disable - there is also a sheet tab if you have many many lights (similar to the old data tree)
There is also a lightlinker
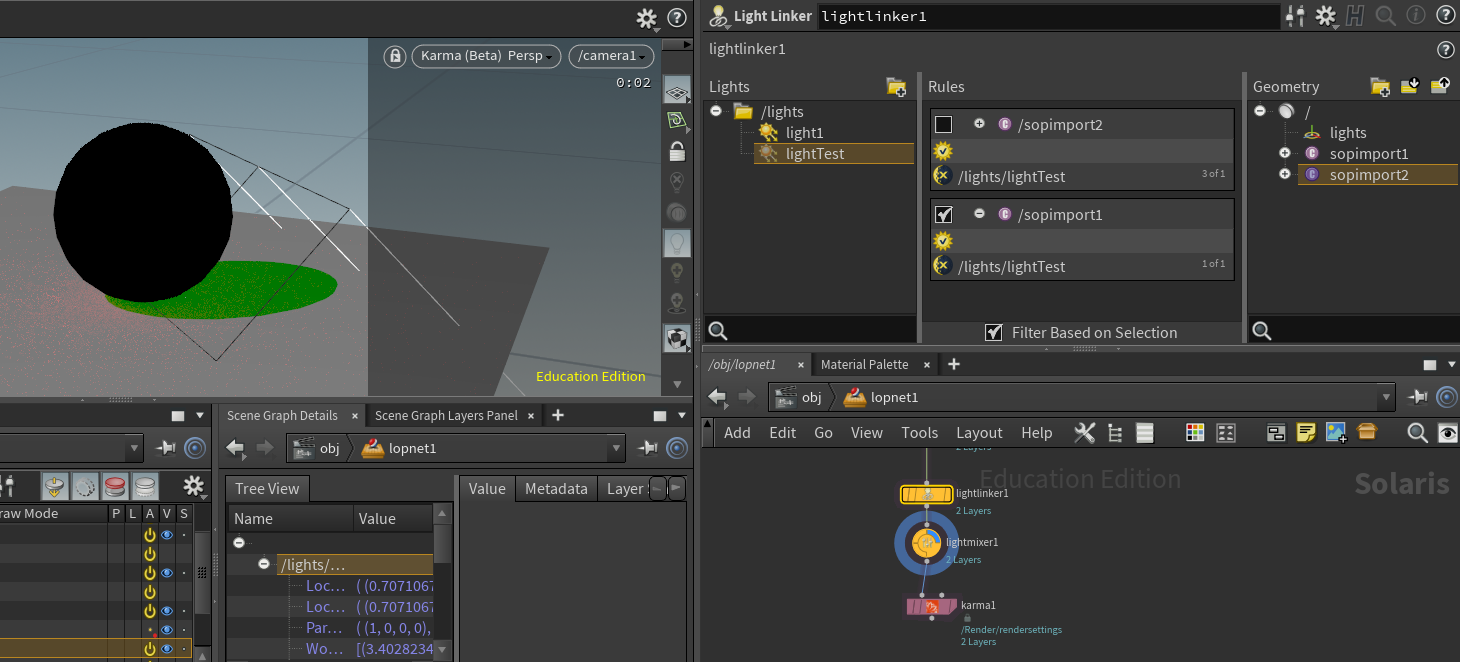
In the figure I have two rules, one enabled to turn the light off of the sphere.
see also H18 Launch Presentation at timestamp 28:02
For the preview render in the viewport, you can hit d and it will bring up the options. For quick preview set samples to 2.
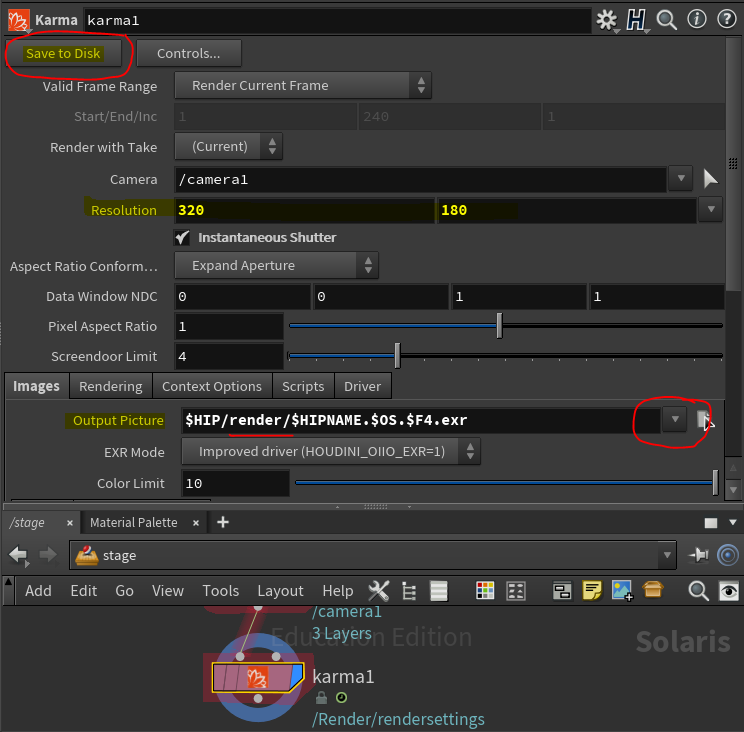
For an actual render - note the karma lop (node). Specify where you want to save the image and then click Save to Disk. This will create your rendered image (a process husk.exe is run)