Houdini Troubleshooting
- Windows 11 Note — if your geometry disappears
- Renderfarm Issues — troubleshooting on the renderfarm
- Redshift Issues — see my page on Redshift
- Karma/USD Issues — see my page on Karma
If it is an OpenGL issue (geometry not showing up) it is either out-of-date drivers or the NVIDIA GeForce Experience not being set to Studio Drivers — described here.
Generally speaking, walking up and down the node network with the display node is the best way to debug your networks in Houdini. Houdini is non-destructive — all your history is there. As Jeff Wagner put it, you can "change anything — anywhere — anytime." This allows you to work your way up the network and see where and when something has gone wrong.
- Work modularly. If a job is too big to tackle, break it into smaller tasks. The process of debugging is similar — isolate the problem. You can also create sample files to test a node in isolation.
- Trust but verify. If you think a node is doing something correctly, confirm it. On the flip side — if you think a node is causing a problem, bypass it and see if the issue goes away. Try to reproduce the problem in a simple case.
- Isolate. Go to the place you suspect the problem might be — that is what experience is: knowing where to look first. Eliminate red herrings, narrow it down to the exact place, and prove it. Don't assume; narrow it down and show that it is broken. From there you can solve it.
These tips work whether you are debugging a 3D package, writing code, or tackling anything in life. Break it down, solve one thing at a time with the big picture in mind.
Do not trust the GL viewport — always render to Mplay or the command line to confirm.
Remember to check the Geometry Spreadsheet. When experimenting with simulations: reduce to a simple case, test, then build from there. Simple case files are faster to test.
Not able to write to the license file on Windows? Run Houdini as administrator.
- You can set this as the default behavior by right-clicking the icon and choosing Properties.
- Under the Compatibility tab, check "Run this program as an administrator."
Wrangles — if you change the name of a node, the reference in your expression in a Point Wrangle does not auto-update (hscript does).
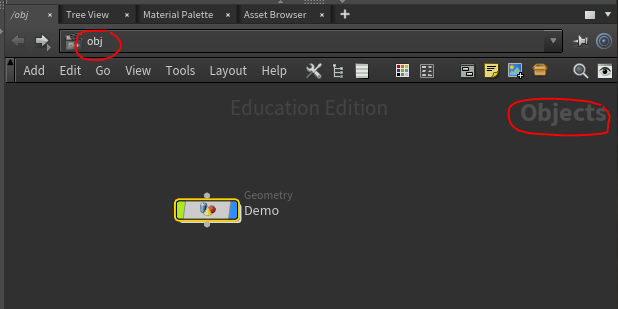
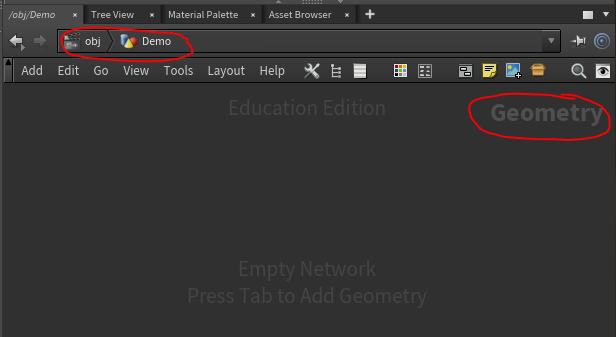
No copy node? Check that you are in SOP (also called Geometry) context, not in obj.
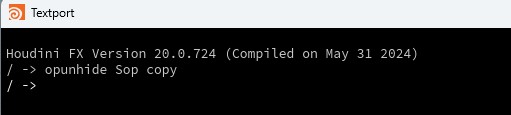
As of Houdini 19.5 the copy stamp node is hidden from the tab menu. You can retrieve it via the Hscript Textport (Windows → Hscript Textport, or the Technical desktop) by typing:
opunhide Sop copy

Alternatively:
opcf /obj/geo1; opadd copy- In the above,
geo1could be whatever your container node is called.
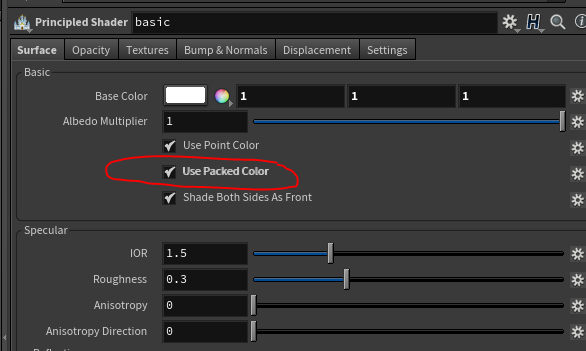
Colors disappearing when you pack? Make sure your shader has Use Packed Color enabled.
Materials disappearing? Corollary to the above: if materials are still not showing with packed geometry, do not unpack. Instead, set your Rendering / Render property to Save All Materials in your Mantra node.
Boolean not working? Ensure you are not feeding in already-packed geometry. Also check that you are feeding in solids; if not, change the property to Surface. The Boolean's behavior differs between these settings.
Hipfile to examine here (created in H18.0.499).
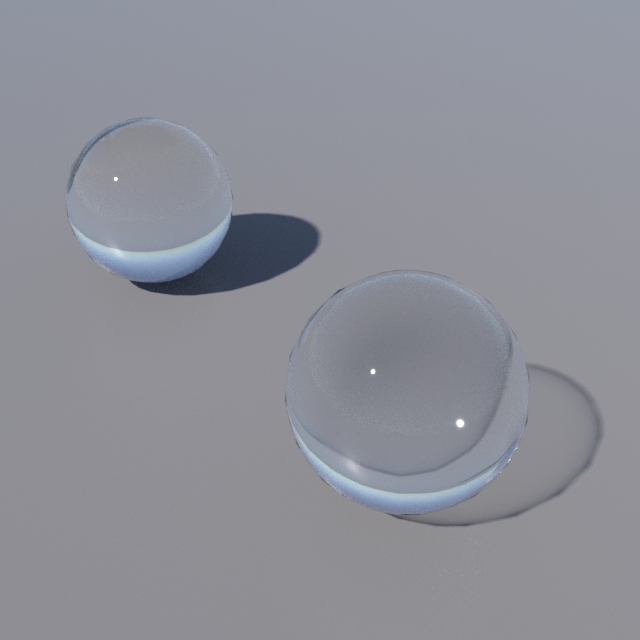
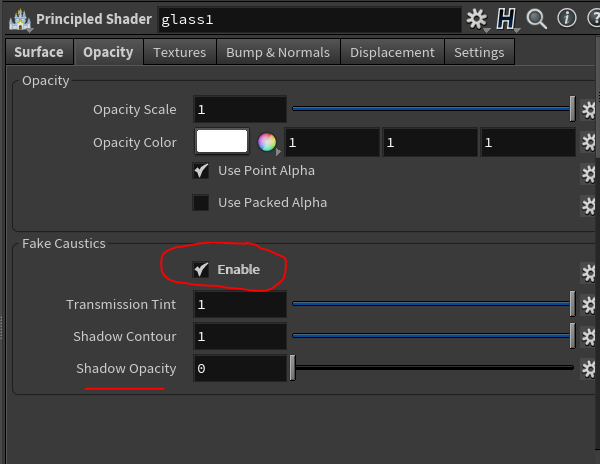
Glass (principled shader) in Mantra — not giving transparent shadows? Turn on Fake Caustics to ensure you have transparent shadows of the glass object.
Glass appearing shattered in the render before impact? As of Houdini 18.0 this has been addressed, but there are a few steps you have to take. (Tested in H18.0.287 with the platonic solids study.)
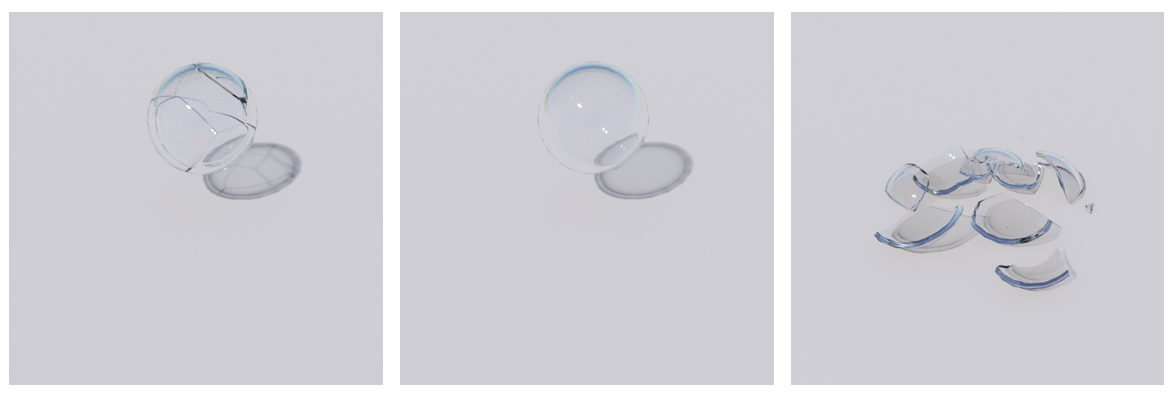
- An example file using the material fracture node is available at RBD-PlatonicStudy.html.
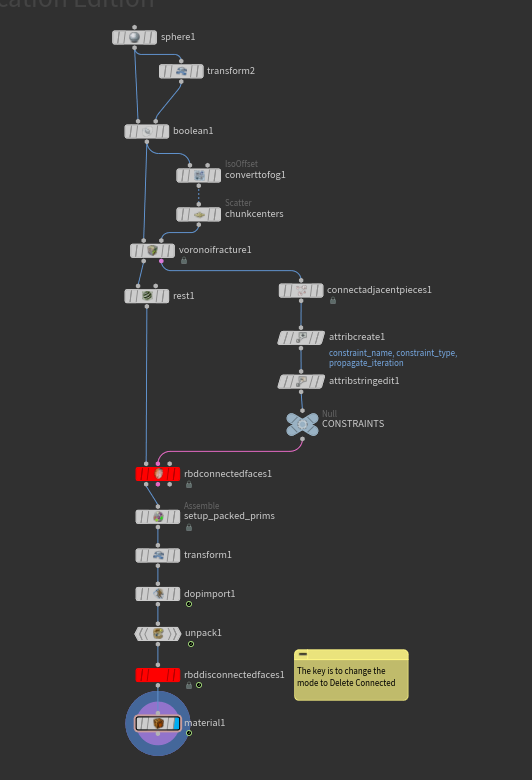
- The material fracture node is not required, but what is required is an RBD Connect Faces SOP and an RBD Disconnect Faces SOP with Mode set to Delete Connected.
- Example file in H18.0.499: glassLooksBrokenFix.hipnc
This is discussed in the SideFX documentation: sidefx.com/docs/houdini/destruction/glass.html
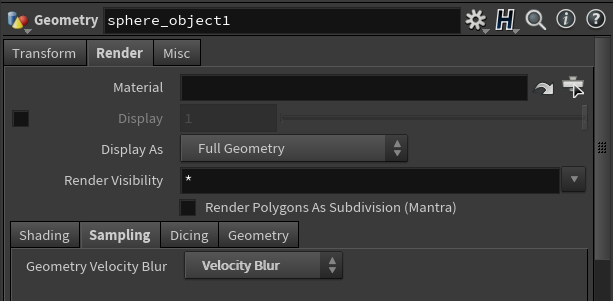
Motion blur adjustments needed? Remember to enable motion blur in your Mantra node and velocity blur in your object container node's Render tab.
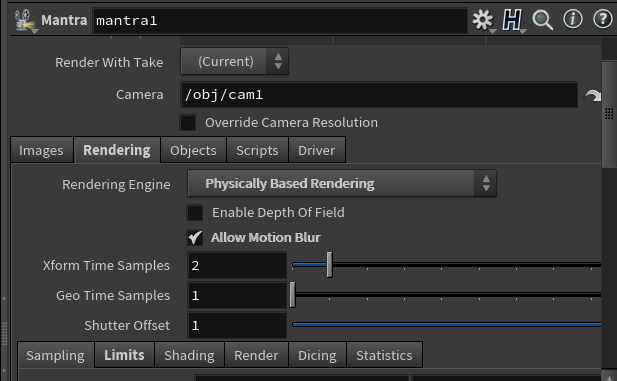
- Motion blur settings matter especially when compositing Maya and Houdini elements — be sure to match forward, backward, or mid motion blur frames using the Shutter Offset parameter on the Mantra node.
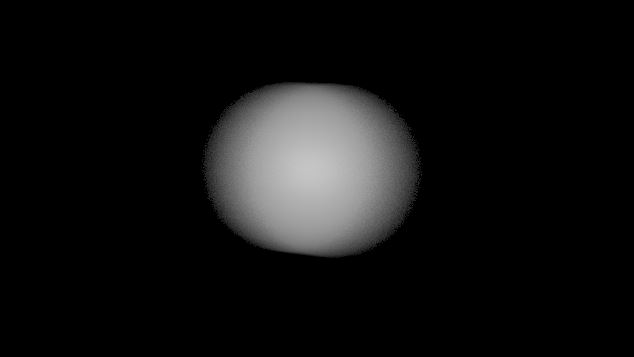
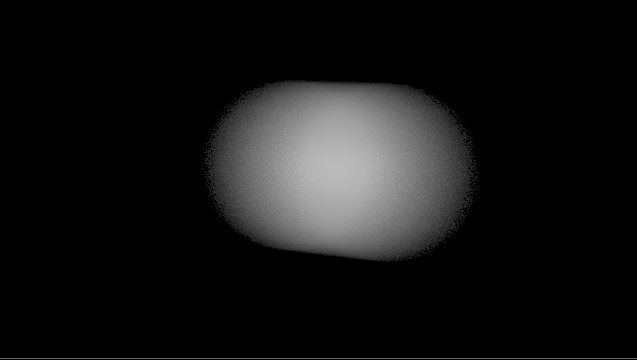
- To adjust a motion blur effect after the fact, you can manipulate the velocity. Example file: manipulateMotionBlur.hipnc — left is regular velocity blur, right is blur increased by 2×.
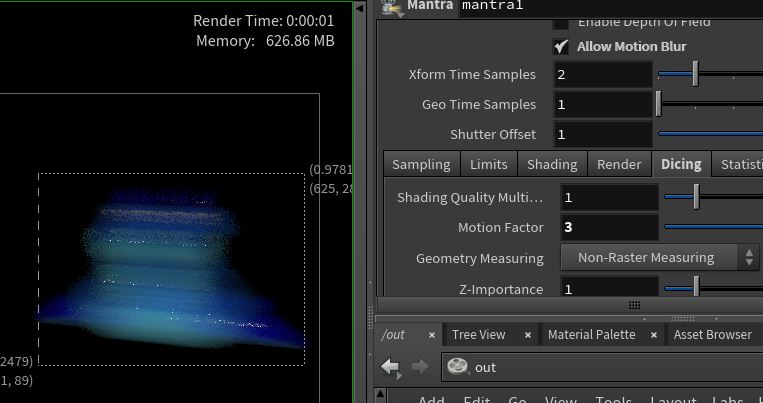
Motion Blur optimization using Motion Factor (in the Mantra Dicing tab) — for a super-blurry object you can reduce render calculations using Motion Factor. Example below shows motion factor 0 vs motion factor 3, giving an 11-to-1 second result.
Example file: manipulateMotionFactor.hipnc

Motion blur on camera can be controlled via the Shutter value in the camera tab (different from the Shutter Offset).
In USD/Karma you can override "velocities" even after USD files are saved: blurFix.hipnc
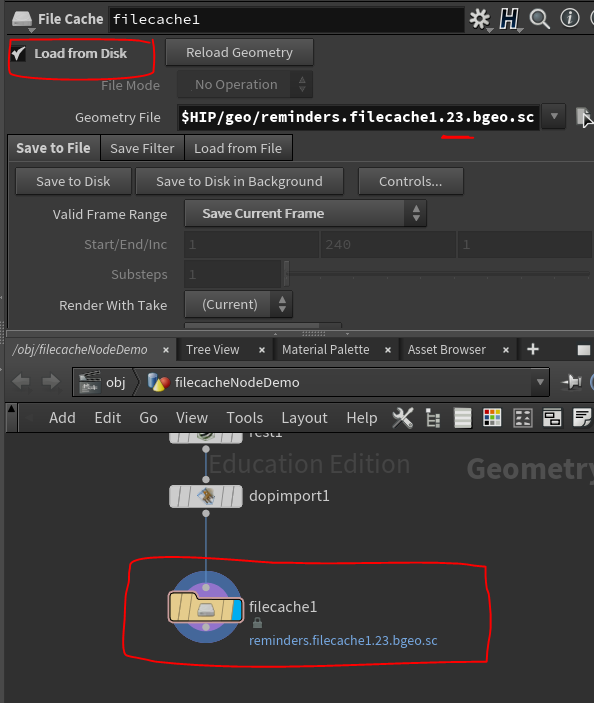
Still simming even though cached? Ensure Load from Disk is on and the display flag is on the file or filecache node. See the caching section for details.