Deborah R. Fowler
Rotated Squares
Posted Jan 11 2020
Updated Jan 12 2020 - added video
Patterns are interesting and we have tools that allow us to procedurally generate them easily. Below I will look at the example of rotated squares. This came out of a desire to produce the pattern in turtle graphics in Python after experimenting with it in Houdini.
If you are not familiar with python you may also watch the video version:
If you take a square and exponentially shrink (or expand it) while rotating it at a certain angle, it can give you some interesting patterns. Below are rotated squares in Houdini using a filled (closed) circle of division size 4 (hence a square) and using the copy node to scale and rotate it. Similar to the spiral illusion we will use an exponential curve to shrink or grow the size of the square. This is done quickly in Houdini by taking a circle of dimension 4, rotating it 45 degrees, using a copy node with expression for the scale (exponential curve to shrink it pow(1/1.2,$CY), so the inverse value of the expression used in the spiral illusion so that we can frame with the beginning square and so we can draw them large to small so that in turtle graphics we are able to fill the resulting polygons.
Here are some examples in Houdini. Each pair uses the same calculations, the line drawings I find the most appealing, next to them are the corresponding filled polygon versions.


What is you were to use Python and Turtle Graphics? The same approach can be used. It is imperative that you use the shrinking rather than growing if you want filled squares as in turtle we are using a 2D tkinter window. Here are the same equations used in turtle graphics and python. The first one is 20 iterations, rotated 12.5 degrees and shrinking with pow(1/1.2,i). The second is 44 squares, rotation 6.05 degrees and scaling 1/1.1. The final one is with a smaller rotation, slower shrink rate and less rotation (70,1/1.05,3.125) and finally the same equation but iterating 20 times instead..


Looking at the code, these are an excellent example of the for loop in python. (In Houdini, a copy node really is an implicit loop - node that represents code).
To draw a square we create a function:
def drawSquare():We can add parameters to the function. Below we have added size:
for i in range(0,4):
turtle.fd(100)
turtle.left(90)
def drawSquare( size ):Next we add a for loop and scale the scale squares exponentially shrinking them by raising a number less than one to the power of the number of iteration and rotating them. However, there is a difficulty here that we must resolve. In a 3D application we can adjust where we want to rotate. We can do the same thing in turtle. Right now the way we have the square function setup, it will rotate on the corner rather than the center of the square and we end up with something that looks like the image below:
for i in range(0,4):
turtle.fd( size )
turtle.left(90)
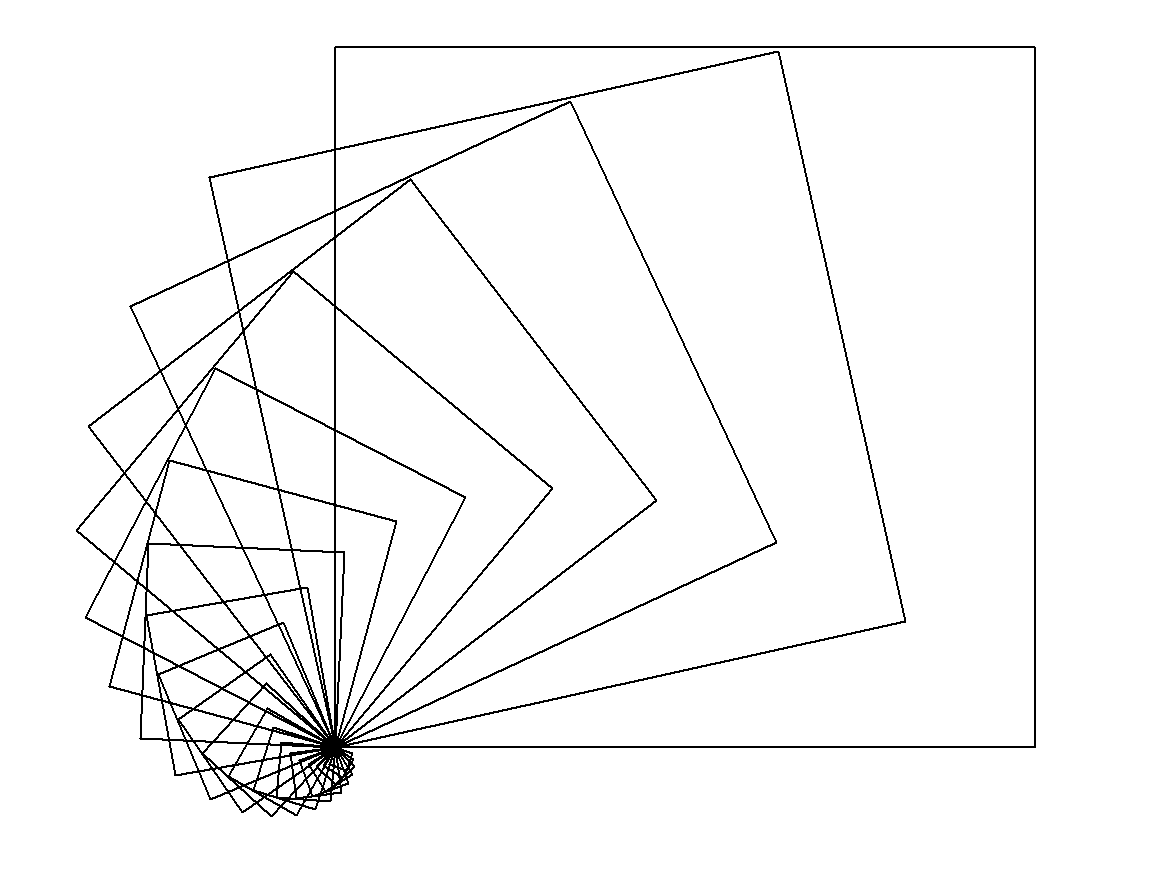
It too is an interesting pattern, but not what we want. We need to set up the turtle so that it is drawing the square at the center. To do this we can move the turtle to -halfsize in x and -halfsize in y (where halfsize is a variable with the value of size * .5).
Do not use turtle.setpos(-halfsize,-halfsize) because it will not take into account the current turtle's orientation which has been rotated for the next square. This corrects the first square but does not
The proper way is to move the turtle backward along its local axis. This is easy with the backward command.
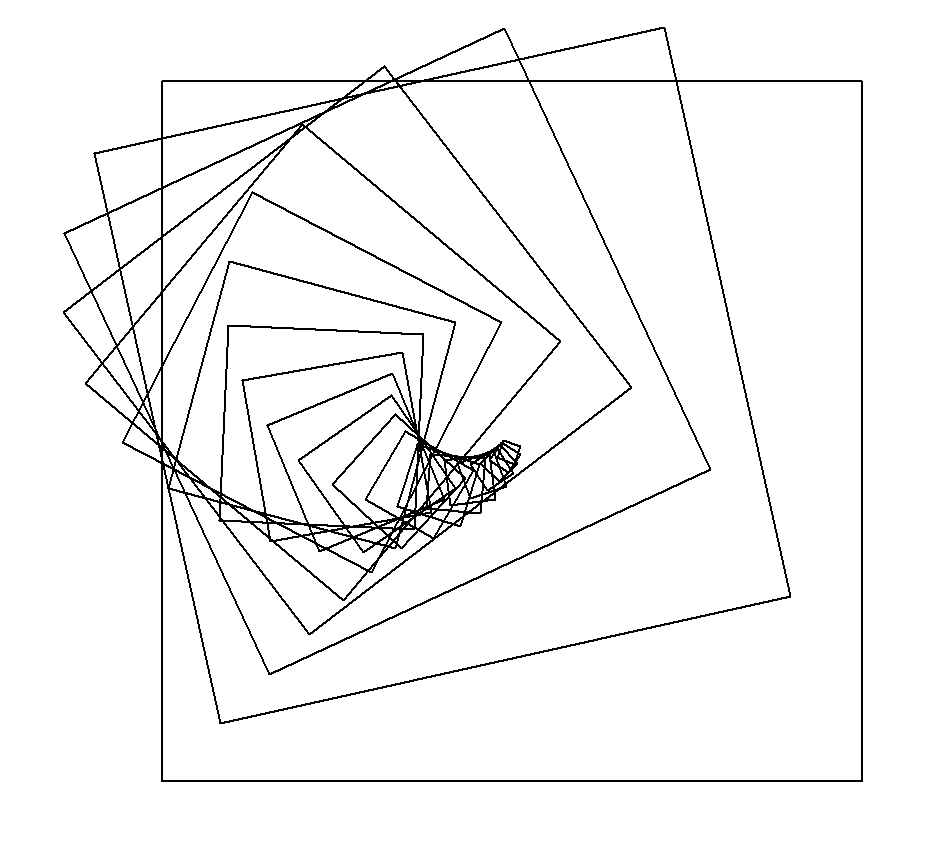
def drawSquare( t, size, angle ):Once the turtle is setup to draw the squares relative to the center at the origin, the resulting pattern is correct:
# rotates
t.left( angle )
# sets up the turtle to draw the square properly
halfsize = size * .5
t.pu()
t.setpos(0,0)
t.backward(halfsize)
t.left(90)
t.backward(halfsize)
t.right(90)
t.pd()
# draws the square
for i in range(0,4):
turtle.fd( size )
turtle.left(90)
If you click on the image or on the link you may download the code. (If you would like to see the "filled" code it is here). The drawSquare() function is called from our pattern function
def drawSquarePattern(t):A few useful commands from this as well are:
t.color("black")
drawSquare(t,700,0)
for i in range (0,20):
size = 700 * pow(1/1.2,i+1)
drawSquare(t,size,12.5)
t.ht()
To determine your window size: turtle.setup(750,750)
To label your window: turtle.title("Rotated Squares")
To go as fast as possible: turtle.speed(0)
To leave the window open (independent of IDE): turtle.exitonclick()