Deborah R. Fowler
Dot Product - Any polygon, but not hitting the top - even concave
Posted June 20 2022
Updated on June 21 2022
Updated on July 10 2022 - updated with DOF info
Tags: point wrangle, attribute
promote, dot product, acos, normalize, length
If you haven't already read my discussions about dot product, here and here recall:
"Dot Product is the product of the magnitudes of the two vectors and the cosine of the angle between them. The name "dot product" is derived from the centered dot "
 "
that is often used to designate this operation." See wiki entry.
"
that is often used to designate this operation." See wiki entry.Also on youtube at https://www.youtube.com/watch?v=WOwYyI11xSk&t=5s and https://www.youtube.com/watch?v=BKyYl50EV7k&t=2s
MECHANICS
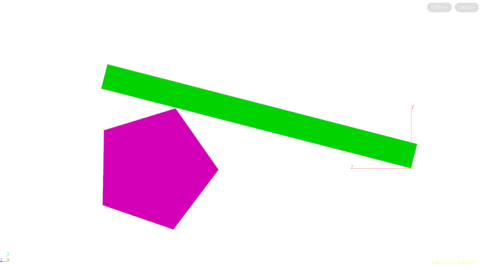
Motivated to take the generalization of any polygon one step further to concave (or short stick) (for preliminary discussion see here and here for previous "Lego Mechanism" and "Spin")
As described on the Lego Mechanism page, the
general idea was to use acos to compute the required angle
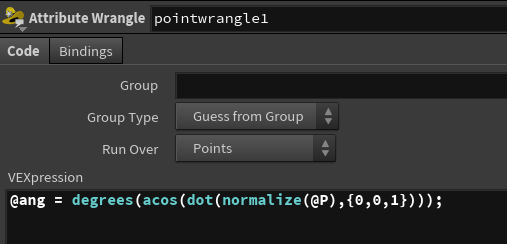
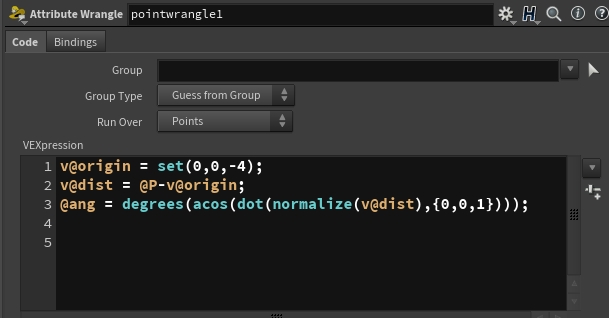
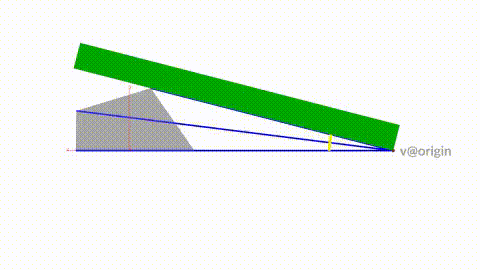
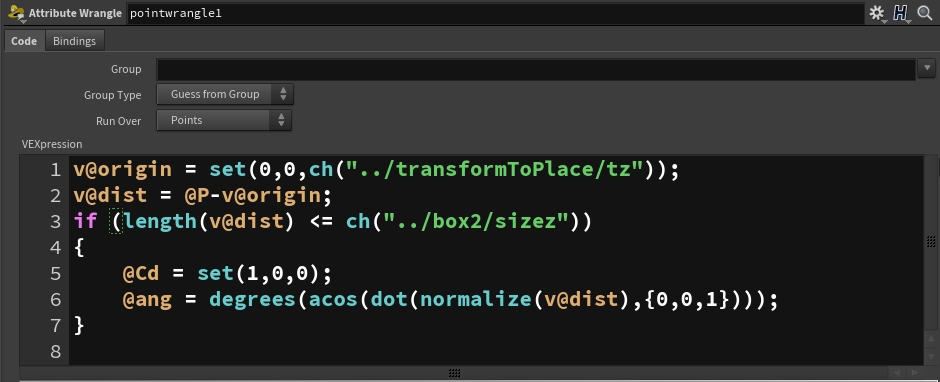
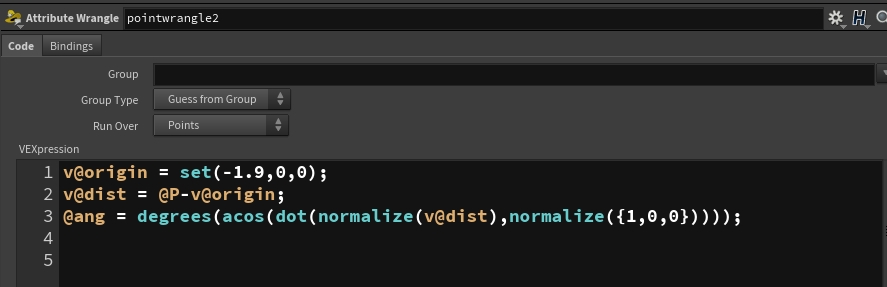
In this case, I am not at the origin, so I added two temporary variables, v@origin and v@dist as shown in the point wrangle below:
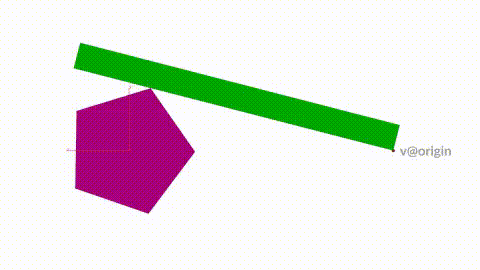
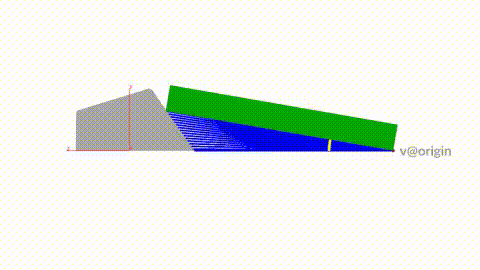
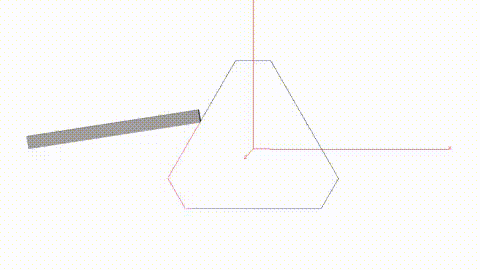
What we are doing is testing each vector (formed from each of the points of the spinning object and the rotation point of the box) with the z-axis. Since we are computing a dot product which gives us an angle, we don't want to take ones below y as that would give us a false maximum. Here is an illustration of the clipped object being fed into the point wrangle with the v@dist vectors shown.The point that needs to be used is the maximum angle indicated in yellow.
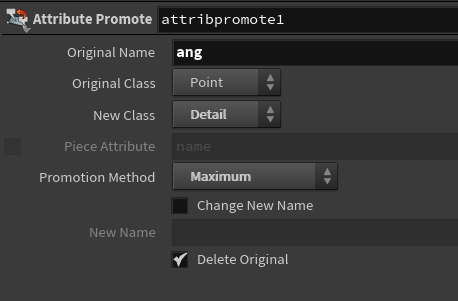
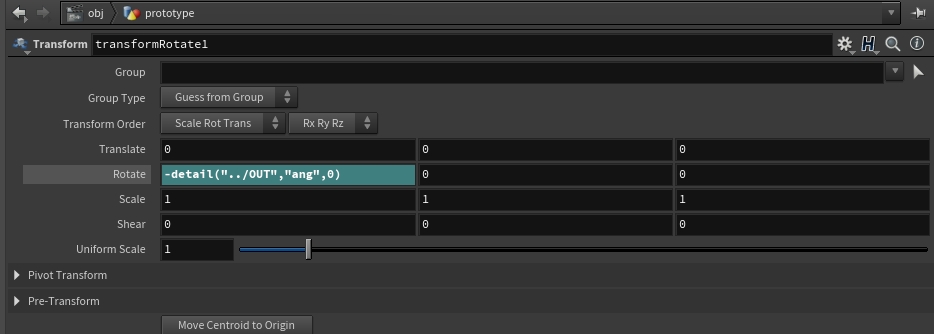
A really useful method for doing this in Houdini is to use Attribute Promote and promote the parameter to detail and select the maximum value. Sweet! I love Houdini! We then just reference the value in our transform rotate parameter using a details function.
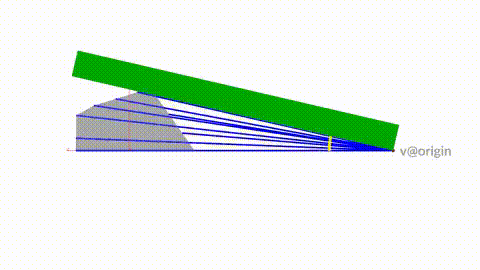
We can resample unusual shapes to get more accurate approximations as well.
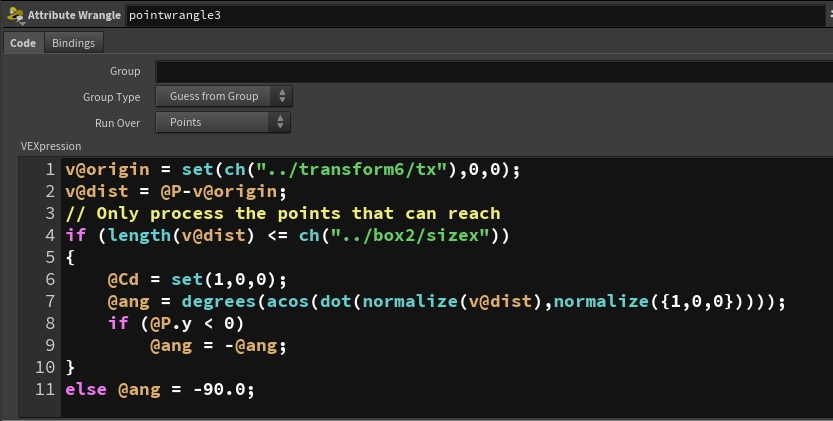
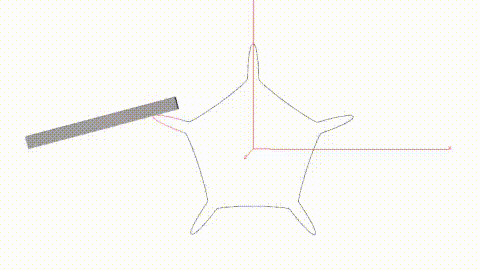
What if the rod was not long enough to hit the top? and/or the object was concave? Now we need to reduce the sampling of the points to only be the ones reachable. In this case that is easy to compute with the length(v@dist) and if that value is less than the length of the rod, we don't use it.
Note that the jittering we are seeing below is due to not enough samples - we can turn up the number of points by adjusting the resample node.
SPECIFIC EXAMPLE
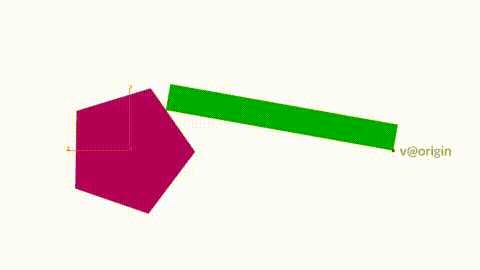
For my particular example I was working in the xy plane. My rod is -1.9 units in x to the left, therefore I am taking the dot product of the vector formed by the point on the surface and the rod rotation with the positive x-axis vector.
This works well for the rod that rests on top.The reference to the angle will be positive.
For the concave shapes with a shorter box length, it is similar to the prototype but now on the xy plane. The area of points that are evaluated are indicated in red.
As shown in the videos at the top of the page, this works for many different configurations of gears. Below is an example schematic.showing the falling behavior when @P.y is below the x-axis (or zero).
The vertical rod was computed using intersection analysis similar to the one on my tips and tricks page, however I wanted to be accurate with the thickness on the vertical rod. In order to do this, I fed the tube object into the intersection analysis and then used the attribute promote to grab the maximum point. This is particularly evident in the "Dot and Details" video.
Procedural gears were created using a copy of circles, join, and polyspline.
Depth of Field in Houdini's compositing network
I did use DOF in compositing on the multiple gears (Dot Details). Many of you use nuke, however I like to work in Houdini's img context. For depth of field I usually have to remember how to set this up so I'm taking a moment to include it here.
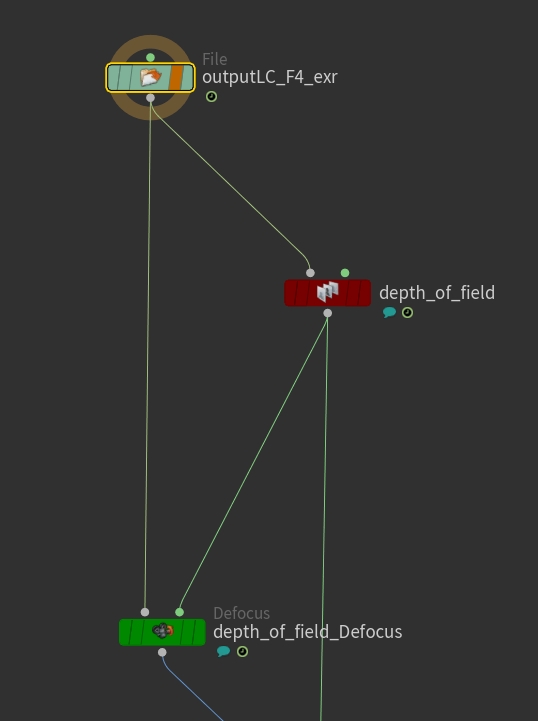
The file node is straightforward. (In mantra you will have used Pz as your extra image plane)
depth_of_field
- set your Focus Distance and Depth Adjust - how do you figure
out what that is?
- to find the value for focus distance - vis your dof node
(display flag blue), select the Pz channel, and click
i in the compositing viewport - this gives you image
info - move your cursor to the part you want in focus and read
the value below the box (in my case I used 4.6 and depth
adjust 0.5 but this will vary with scene scale)
- in the Mask tab this is left as Operation Mask (default as of 19.0.383)
depth_of_field_Defocus (defocus node)
- in the Mask Input tab set Mask Input to M
- Defocus controls how much you want to blur, check on
per-pixel defocus, I turn off Boost Intensity of Bright
Spots (find it looks fake)