Deborah R. Fowler
Houdini Modeling
Posted 2013
Updated on Jan 23 2022
Updated on June 26 2022 to include SideFX's modeling
learning path https://www.sidefx.com/learn/modeling/
Updated on Mar 8 2024
Modeling Tips:
- REFERENCE, REFERENCE, REFERENCE
- and pay close attention to relative proportions!
- my sampleModels.hiplc an assortment of the nodes listed below
- my proceduralWindow.hiplc
quick example introducing a few nodes
https://vimeo.com/247357809
Some of the nodes listed below for example as used to create this wheel of dropping marbles.
http://www.deborahrfowler.com/HoudiniResources/RBD-WheelDroppingSphere.html
Note that box modeling is a popular and powerful technique. However there are better methods of modeling objects that display radial symmetry.
For example revolving nurbs curves around an axis. You are expected to have modeling knowledge, however this page is to provide tips to Houdini methods and equivalents. Sometimes just knowing that the node exists helps. Some nodes to be aware of as you begin to explore modeling are:
General overview video (H19.5) of many of the nodes listed below https://vimeo.com/907301692
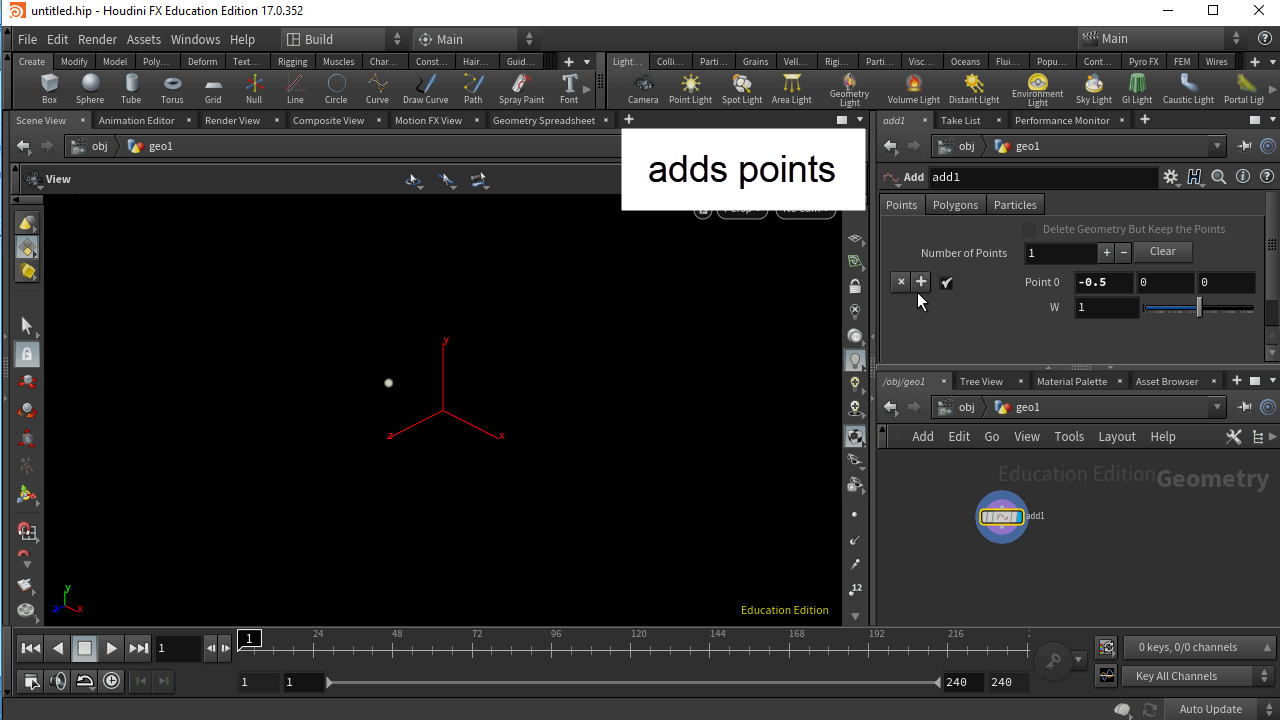
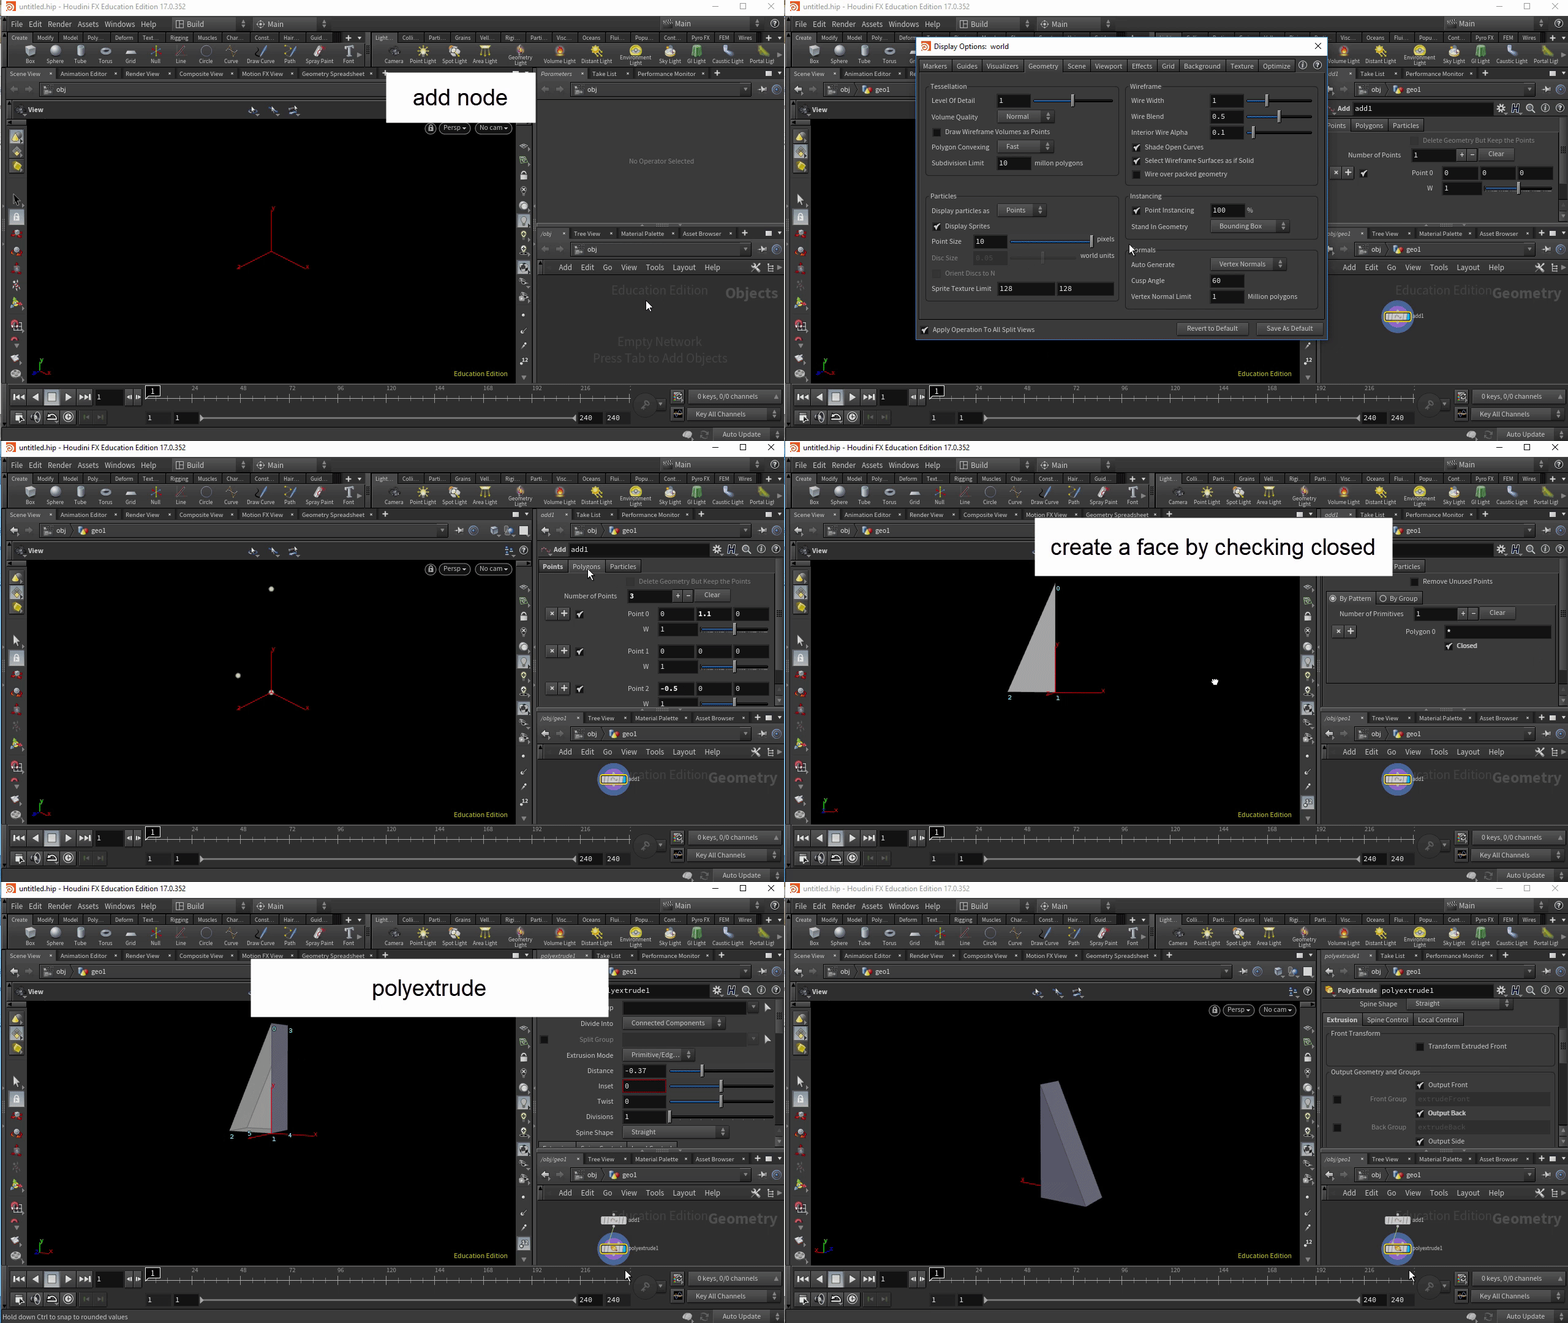
- add - creates points, you can join the points in the
polygon tab and also close the line to create geometry
 boolean - gearExample.hipnc
(H19) gears created using a boolean node along with
polyextrude
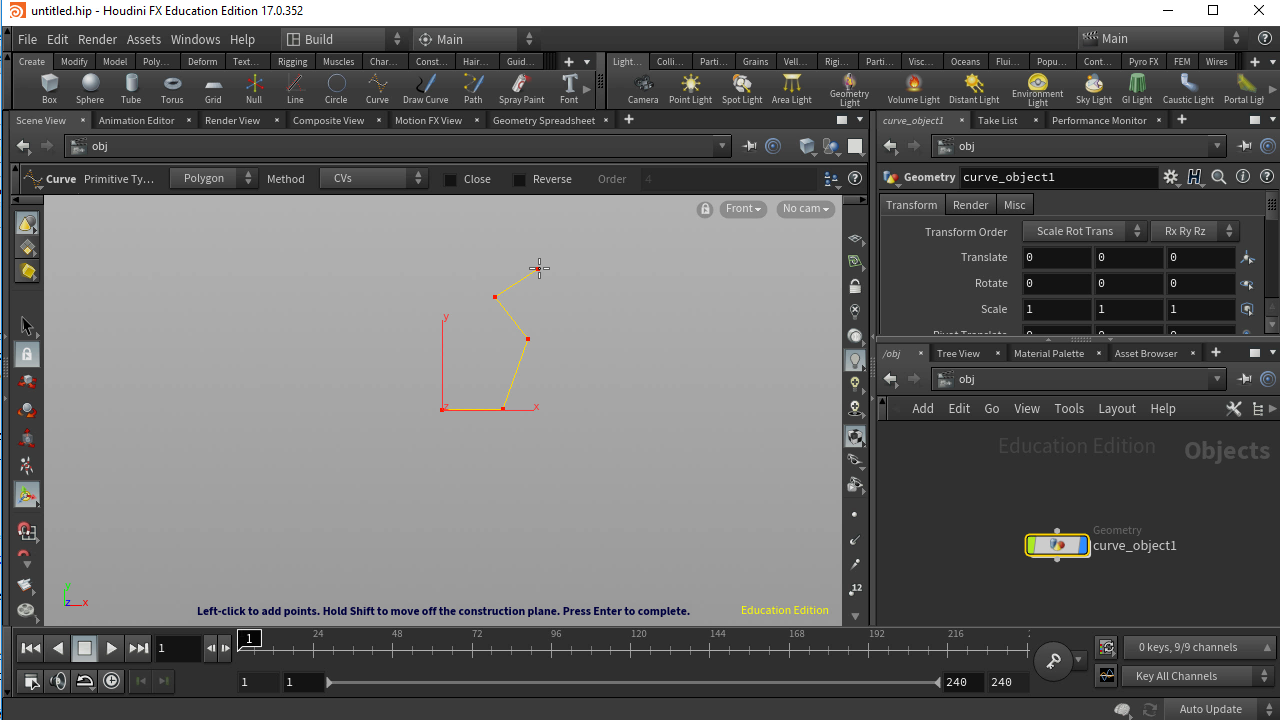
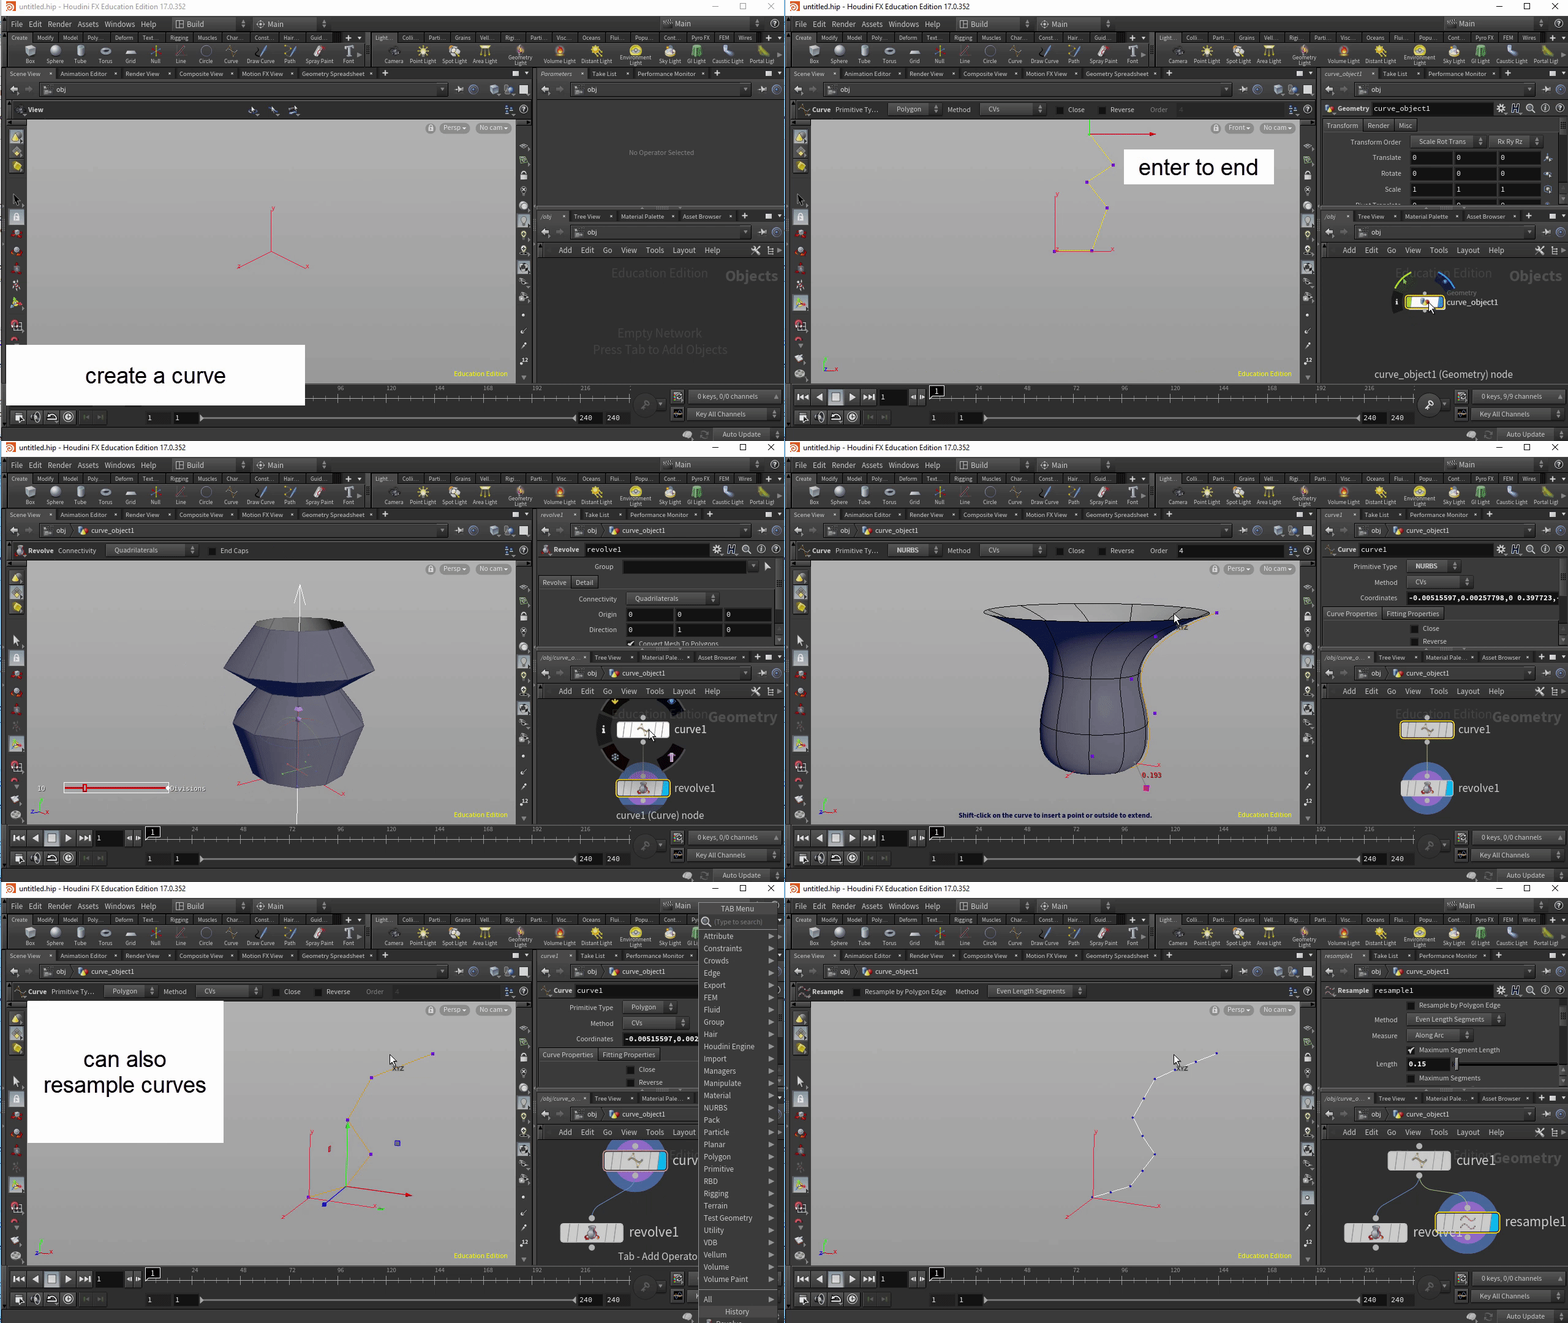
- curve - note there are different types of curves - read the documentation and use the appropriate one
- revolve - revolves a curve to make geometry
- resample - change the way the curve's points are assigned
- NOTE: resample node allows you to use "subdivision curves" which is a nice way of getting smooth curves without converting to nurbs
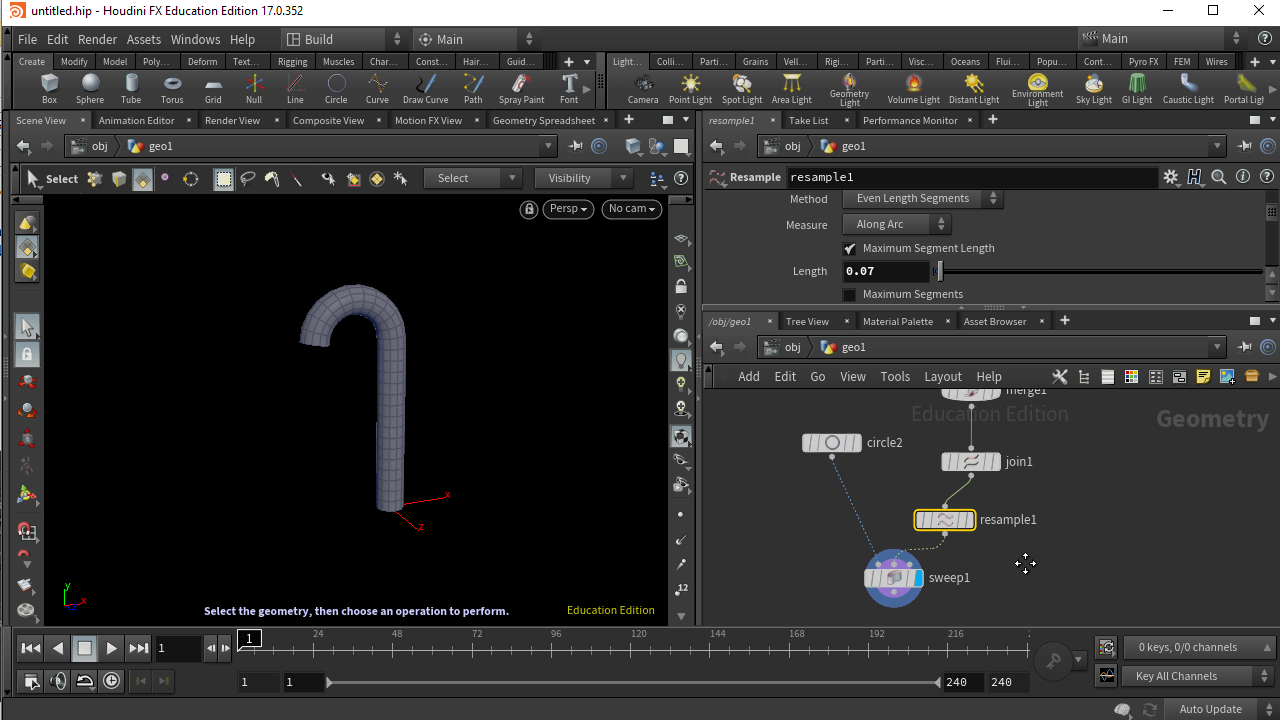
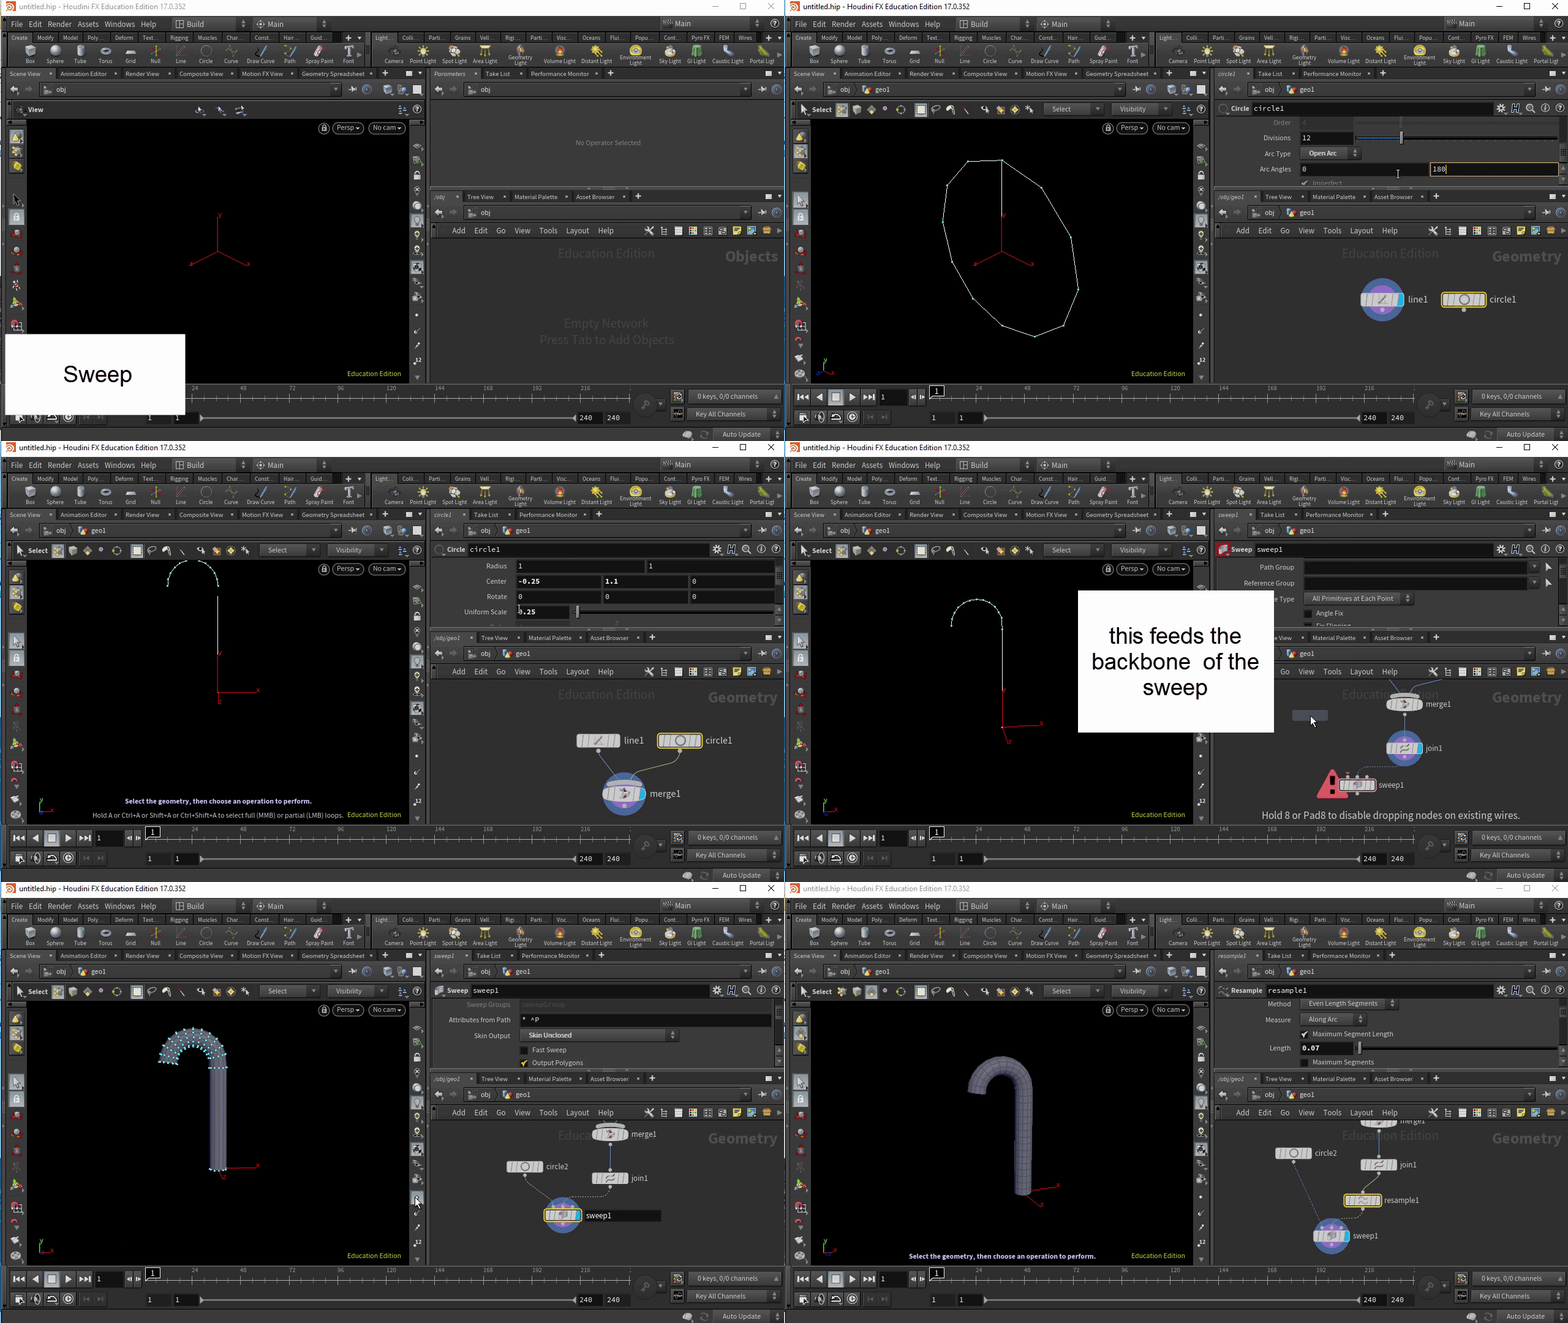
- sweep - given a backbone and profile curve, creates
geometry
- skin - skins over curves to create geometry
- polybevel (note that H16.5 and up you can bevel in the
shader as well! Under the bump tab in mantra. In redshift just
add a round corners node to the bump map)
- polypatch - adhere two polys together (note you may
need to reverse the order of the vertices of one with a sort
node)
- polyextrude - note that you can select to output front
and back faces and create groups
polyfill (also called polycap) roundedFace.hipnc (H19) two methods
- creep - move geometry along a surface, example on tips and trick page under creep
- delete - can also be handy as you can use expression to delete geometry, or particular groups
- group by expression - you can select groups to blast
or delete - and with a checkbox, select the complement of that
group
- ends
- join - join the ends of a curve
- trace - take an image and make it geometry
- trim/project - example on tips and tricks page under trim
- clip - use seen on the RBD example listed above as well as example on tips and tricks page under clip
- matchsize - resizes and recenters geometry https://www.sidefx.com/docs/houdini/nodes/sop/matchsize.html
- also https://www.youtube.com/watch?v=3G66hPsjs9c
Paul Esteves has fun features on nodes on his youtube channel
Add Node / Polyextrude
Curves / Revolve / Resample
Sweep / Line / Circle / Join / Resample
An interesting
pdf booklet on modeling in Houdini I ran across here. It is by
Patrick Janssen from the Department of Architecture, National
University of Singapore. Although this is written for earlier
versions (9 or 10), it has some really good material.
More recently
John Moncrief goes over proceduralism
and builds a bridge system. (SIGGRAPH 2016)
If you are
looking for examples of using Houdini for hard body modeling,
here Akira Saito does just that! Look at the tutorials on the
site from SIGGRAPH Asia Houdini Hive https://www.procedural-design.com