Deborah R. Fowler
Houdini and Redshift DOF
Posted March 13 2022
Updated on March 2 2024
In Mantra you simply check the Pz box, in Redshift a few more steps are required. Here is a hiplc and resulting exr to compare.
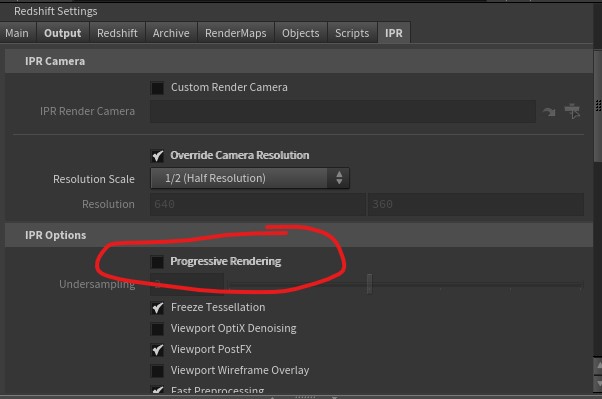
It is important to note that the z depth information will not show up with progressive rendering, only bucket so first thing to do is turn off progressive in ipr
It is also VERY important to pay attention to your near and far settings (I had them set in my sample file, but later had to go back to my sample file to see why my dof aov wasn't showing up)
Also note, you can view your zdepth channel in the composite view and if you type i it will show you the values. Super intuitive, particularly if you normalize the values (see below).
I personally prefer to normalize the values, it is not required.
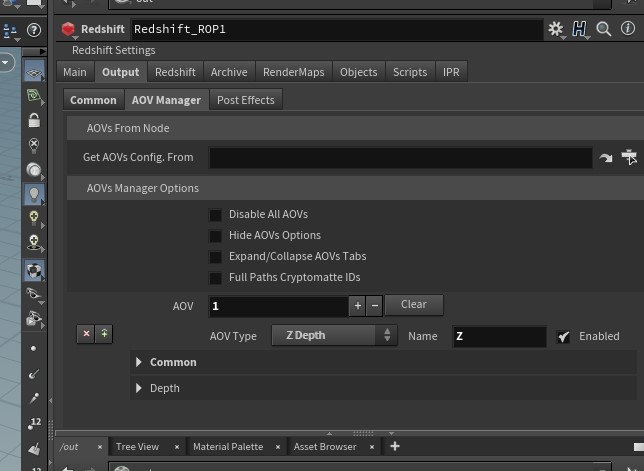
Next, ensure you have the ZDepth channel aov added
and set up the following. In particular use Set Environment Rays to Black
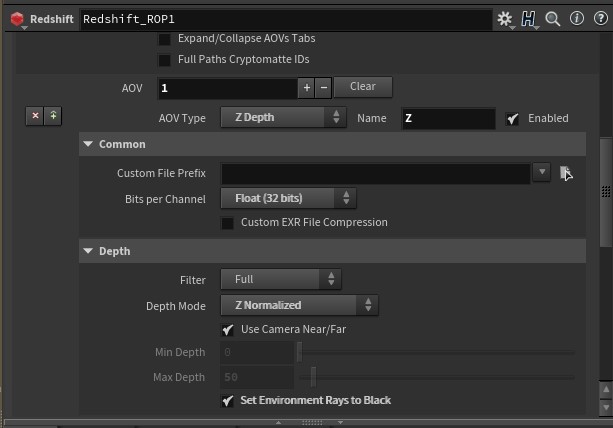
That's it! all set. Here is a hiplc and resulting exr to compare. Again, make sure to set near and far either in the Camera or uncheck that and set min/max in the options in the rop.
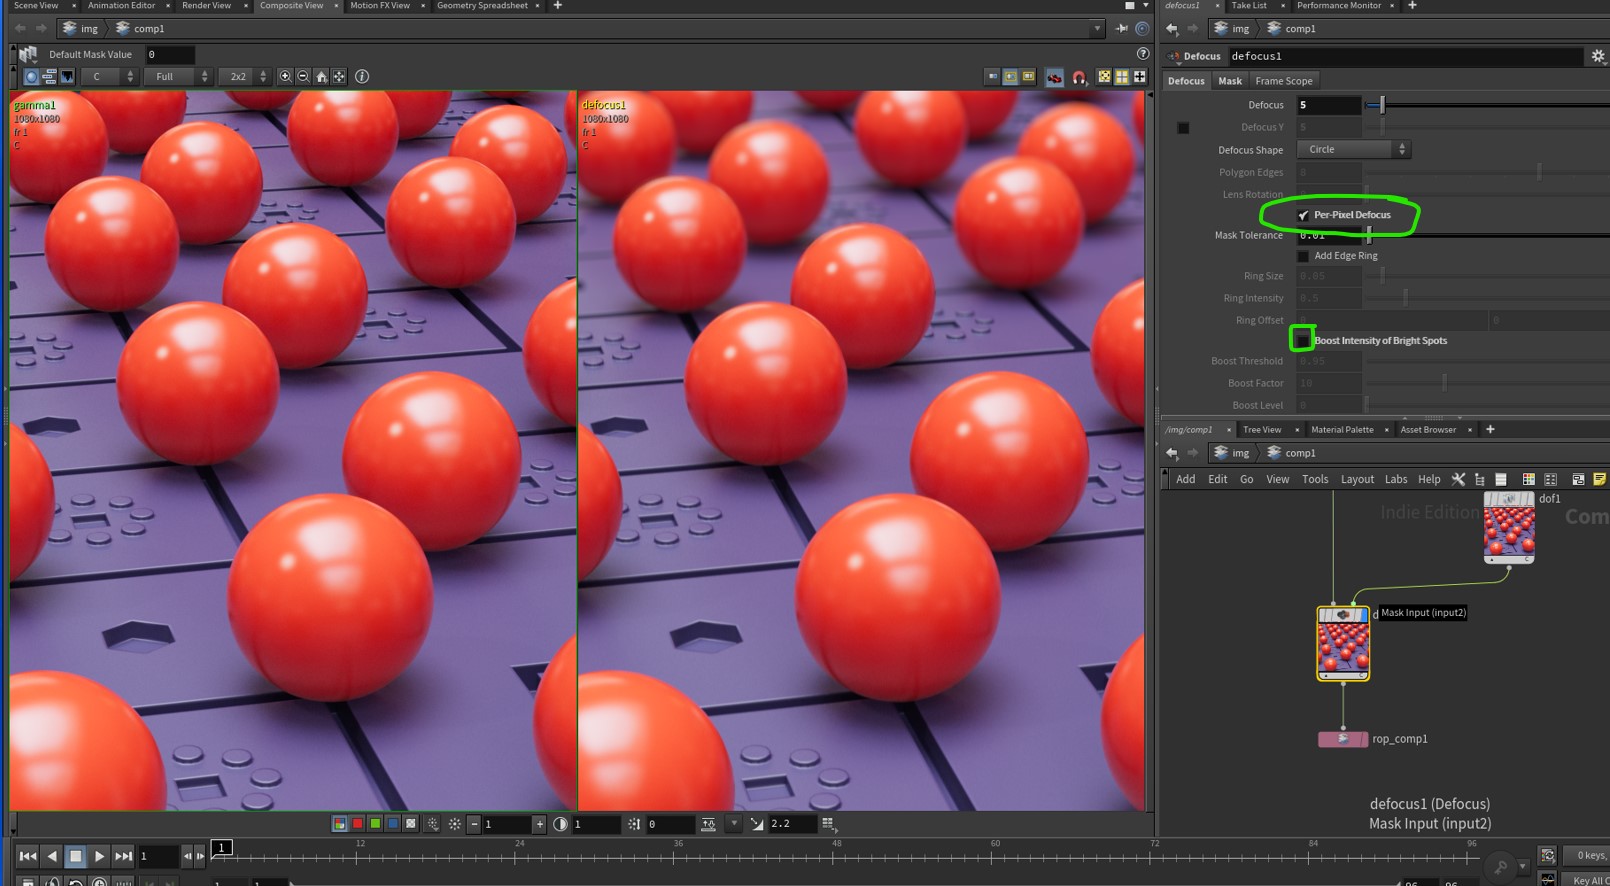
DOF in Houdini COMPOSITING NETWORK
If you do decide to use dof in Houdini, it is easy to set up. It is described below and on the following page very bottom (click here)
Briefly, when you use Z Normalized you will find your values (0 to 1) of where you want to focus by viewing your image in the Composite View tab (assume you pulled it in with a file node) and with your dof (depth of field) node selected, choose the Pz channel, click i in the viewport - this gives you image info.
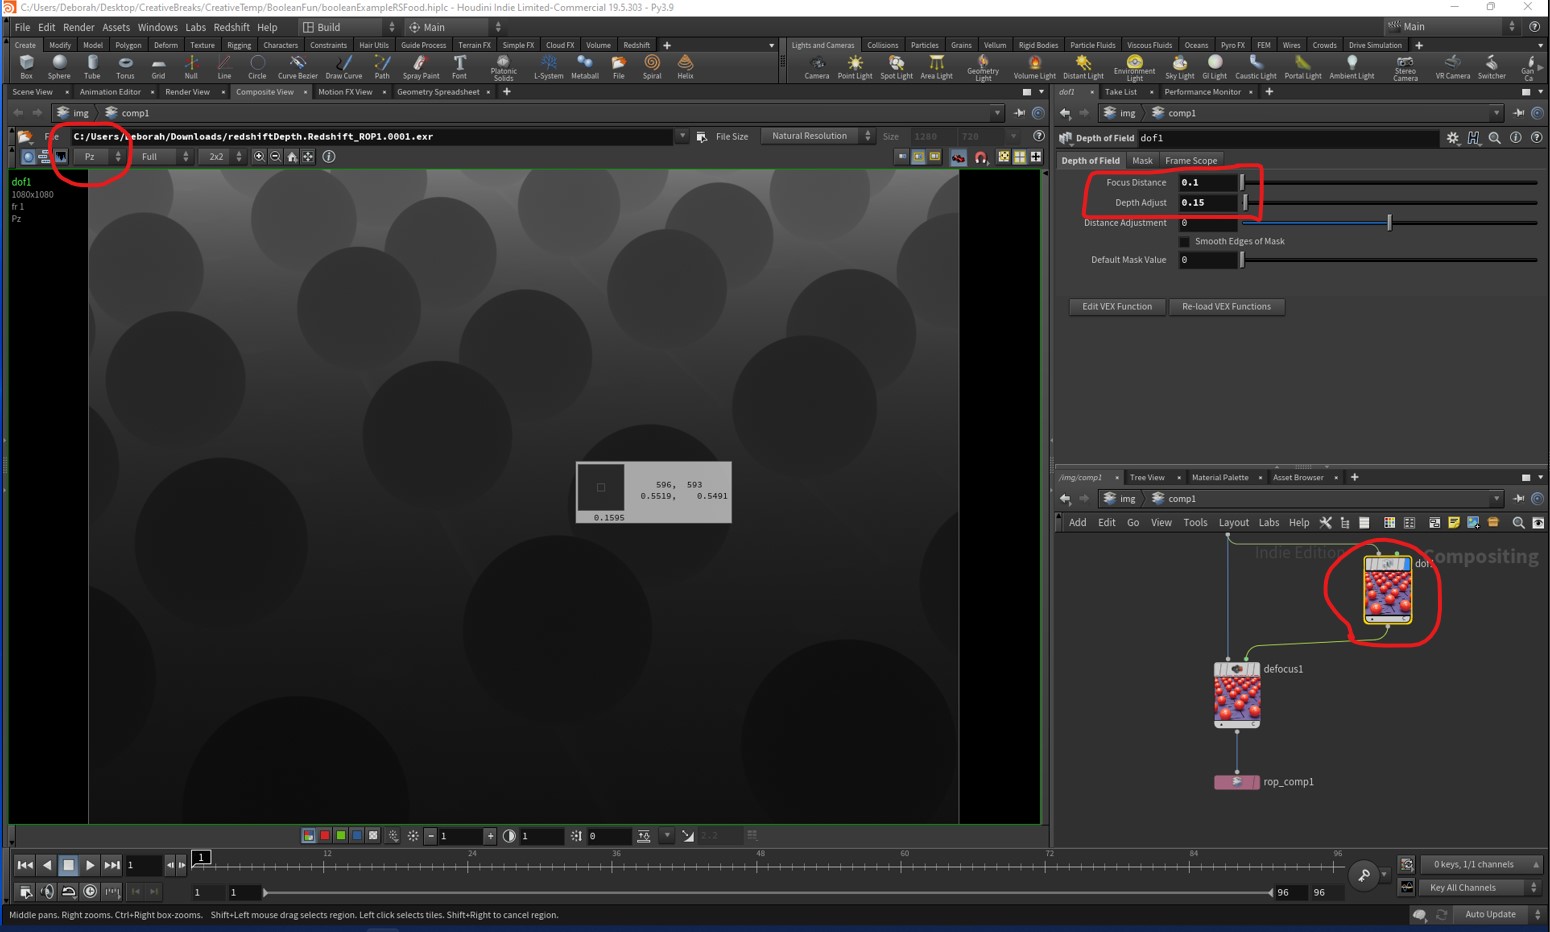
The node network is simply a file node, depth of field and defocus node. In the defocus node be sure Per-Pixel Defocus is checked on. I prefer also to turn off Boost Intensity of Bright Spots.